Your Ad Here
Showing posts with label PS TUTORIALS. Show all posts

Soft Light

Sunday, September 27, 2009


Load the image and make two copies of the current image(layer 1 and layer 2 with layer 2 on top of layer 1)

Blur the contents of layer 1 using Filter>Blur>Guassian Blur. The amount of blur may vary depending on the quality of the image you are using.

Go to layer 2 and change the layer mode of the current layer from normal to soft light.

Read more...

Overlay Fade


Load your image and convert it to grayscale or B&W. To convert your image to black and white go to IMAGE>MODE>GRAYSCALE then convert it back to RGB.


Make a gradient background layer. A pure black or white background will not work with this effect and other backgrounds which are either too dark or too bright.

Paste the image on a new layer on top of the gradient background.

Then go to the layers palette and change the layer mode from normal to overlay of the image on top of the background. Reduce to opacity to get a softer effect on the image.

Read more...

Adjustment Layers

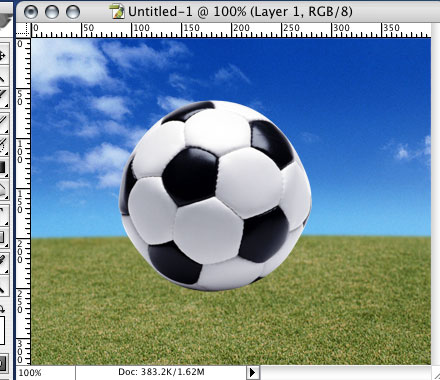
Imagine the ability to apply an effect to a group of layers in Photoshop, and then have the power to edit that effect later, while preserving the original layers. Adjustment Layers allow just that.

Creation
To create an Adjustment Layer, click on the arrow at the top-right of the Layers palette, and select New Adjustment Layer...

Select the type of effect desired, and then hit OK.

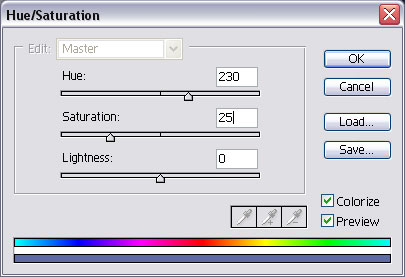
The properties window for the effect choosen will appear, where that effect can be customized. After accepting the values for the Adjustment Layer, all of the layers underneath it will be affected.

Double click on the Adjustment Layer to edit the effect again.

Clipping Groups
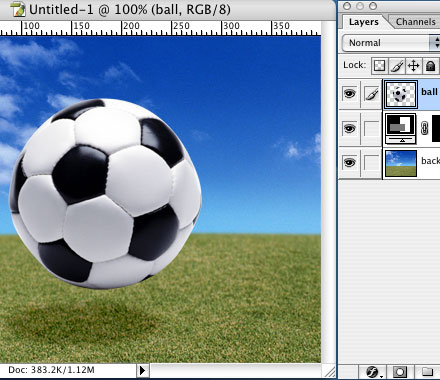
To make an Adjustment Layer only affect the layer directly beneath it, hold down Alt, and move the cursor between the Adjustment Layer and the underlying layer. When the cursor changes into two overlapping circles, click.

This will use the underlying layer's transparency as a mask for the effect. In other words, it will only apply the adjustment to the underlying layer.

Layer Masks
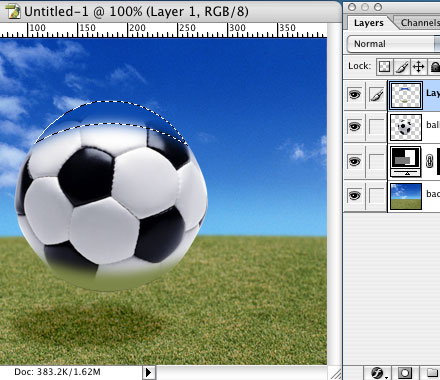
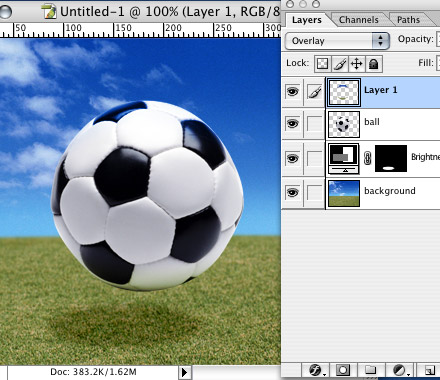
When drawing on an Adjustment Layer, the areas that are colored White will be affected the most by the adjustment. Areas which are colored Black will have no effect, while gray areas will only be partially effected.

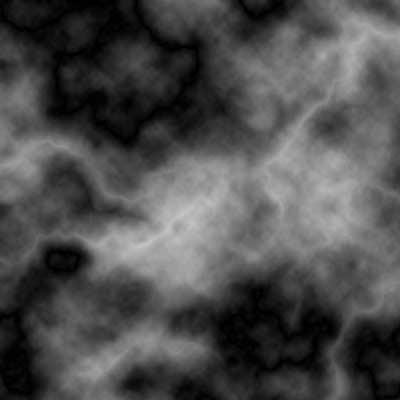
As seen on the left, an Adjustment Layer is being used to Colorize the leaf image Green. By selecting the the Paintbrush tool and setting the foreground color to Black, drawing on the Adjustment layer restores the original image's colors. Drawing with White on the Adjustment Layer would re-Colorize the leaf image. Try it!

Read more...

Photo Montage (the Nudge Method)


1. Crop your images. You can assign a pre-set size and resolution to th

e Crop Tool in Photoshop.

2. Import all of your images in Photoshop. If you copy/paste them they should all be centered. Holding the "shift" key while dragging an image, will center it on the new one.


3. Link the images that will create your top line.


4. Select the Move Tool (V) and nudge the linked images to the top: count how many times you've moved them up(13 in this example.

QUICK TIPS

  • You can hold the CTRL key instead of selecting the Move Tool...
  • Holding the Shift key will nudge layers by 10 pixels at a time.
  • Holding the ALT key will make a duplicate of your layer.

5. Unlink the images.

6. Move one to the left (remember to count).


7. Unlink the images.

8. Move one image to the left (remember to count).

9. Move one image to the right (remember to count).

10. Repeat for the remaining rows.


VoilĂ !


Read more...

Polaroid Transfer

Polaroid Transfer
You won't need chemicals to simulate the classic Polaroid transfers, but Photoshop is required as you need the color channels to recreate it. This not a step by step tutorial but a guide with tips on how to achieve this classic effect.
Keywords: transfert, SX-70, image, emulsion, pinhole, toy camera, photograms, sabbattier, Etchings, bromoil, silver gelatin


1. Make a duplicate of your original image.

2. Desaturate the colors a bit.

3. Add Noise to each Channel (use different values for each one).

4. You might want to the Blur, Median or Reticulate Filters on one or many Channels.

5. You can also erase the borders on each Channel, using a grunge brush to create the borders.

6. You could also add a circle pattern strip to create the metal part found inside the polaroid photo.


Polaroids template

Here's a small gift for e-scrappers.
Click below to download this Photoshop file (685KB).

If you're having trouble sending me an email or would like a png version of this file, you can reach me at denisgermain@quatrom.com

The file only contains the basic elements, but you could add a semi-transparent gradient to simulate the plastic reflection, add a drop shadow. For a more realistic look desaturate the images a bit or play with the contrast on your photo (time to apply that "s" shaped curve!). To bend it (like the one on the right) rotate the image and apply Filter>Distrort>Shear. If you are doing a before/after layout... do it like the magazines: desaturate and darken the "before" photo, so the "after" shot looks so much better!

If you prefer to create your own template, here the official dimensions for the SX70:
3 1/2" x 4 1/2" for the frame
3 1/8" x 3 1/8" for the photo itself

And for the Spectra format:
4" x 4 1/8" for the frame
3 5/8" x 2 7/8" for the photo.

Read more...

Resize and Maintain Original size

Adobe Photoshop tutorialYou have a nice big beautiful photo. It is gorgeous. But you need it much, much smaller, and by the time the file is down to the right size, you might find that the image has started to take on a blurry look. This is a real problem with resizing images, but luckily in Photoshop there's a very simple solution.

This tip will only work with Photoshop CS and CS2. If you don't have a CS version yet I recommend you try and get one as soon as you can, because they are full of powerful new features. For earlier versions of Photoshop there's a workaround at the end of this tip.

When you want to reduce an image go to the Image> Image Size menu. Click on Resample Image and choose Bicubic Sharper from the drop-down menu. This is the best setting for making sure that an image doesn't blur. The example photo of the flower started at 2,000 pixels across. I stepped it down to 250, and then again to 125 with almost no loss of sharpness. For enlarging an image select Bicubic Smoother.

Adobe Photoshop tutorial
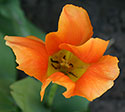
I found this to be such an effective trick that I wished it had been the default setting in Photoshop for the Image Size menu from the start. Then I discovered I could set it as the default myself. All you need to do is go to Preferences> General and you'll see Image Interpolation and there you can pick Bicubic Sharper from the choices.

Another thing to keep in mind when resizing is to try to do it only once on an image. Many people will resize repeatedly as they search for the perfect fit for a design element, and then end up with an image with a lot of blur. It's always better to experiment on a duplicate of the image. Then, when you've settled on the final dimensions, you can go back to the original and resize it just once.

Read more...

Reality Ball

Add Reality To Your Objects

I see many times artworks where a placed object just doesn't look real and it's alien to its environment. One trick to make it belong is to add shadows and colored lights taken from the environment to your object.

Adobe Photoshop tutorial

In this example we are going to put a shadow on the grass and add green and blue highlights on the ball to make it look more realistic.

Adobe Photoshop tutorial

Make sure the light on the object matches the position of the shadow. In this case the light is coming from the top and slightly right corner, so the shadow should fall in the bottom and slightly off to the left from the ball. To make the shadow I created an oval selection, gave it a feather and made an Brightness/Contrast adjustment layer over the background and below the object. Depending on how close you move the shadow to the ball the perception of distance of the ball from the ground will change accordingly.

Adobe Photoshop tutorial

To add the green light on the bottom of the ball I made a big oval selection over the ball containing the ball except a small slice from the bottom. I applied a feather to make the edges of the selections smoother and inverted the selection. Now just press Shift-Alt-Apple and click on the layer of the ball to intersect our selection with the selection of the ball. This way we got a selection that is a slice of the ball, but with soft edges on the top part. Now that we have our correct selection we just need to create a new layer. pick a color from the grass and fill the selection with that color. Now repeat the same procedure for the top of the ball with a sky blue color.

Adobe Photoshop tutorial

Once you have the layer with the two colored spots, you just need to change the layer from Normal to Overlay mode. This procedure is only a slight change of the image but adds a lot to reality. If there are several objects close to each other make sure you make reflections from each object to the other. If your object is shiny, like for example a bowling ball, you can even copy the sky to make it look like it's reflected on the top of your ball.

Read more...

Dots

AGetting Started
- - - - - - - - - - - - - - - - - - - - - - - - - - - - - - - - - - - - - - - - - - -


For this tutorial, save the hoopy water image I rendered, on the left side, and open it in Photoshop.

If you don't know how:
  1. Right click on the image, and click Save Picture As...
  2. Save the image to your desktop
  3. Run photoshop, and open the image file
Now, open the Channels window.

  1. Create a new Channel
  2. Grab the rectangular marquee selection tool
  3. • hold down shift and select a box 18x18 pixels, and fill it with white
    • grab the Elliptical marquee tool [] by clicking and holding on the rectangular marquee tool button
    • with the Elliptical marquee tool, hold down shift, and select a circle inside the white box
    •fill the circular selection with black
Make sure your results look similar to mine.


BSetting the Pattern
- - - - - - - - - - - - - - - - - - - - - - - - - - - - - - - - - - - - - - - - - - -


Grab the rectangular marquee tool again.
  1. Select around the original box, and in the menu go Edit > Define Pattern
  2. Create a new channel, and grab the Paint bucket tool. In the Paint Bucket tool option window (Window > Show Options), select pattern fill contents
  3. Click in the new channel to fill it with the pattern and then on your keyboard hold down Ctrl+I to invert the colors.


Go back to the Layers window. Drag the Background layer onto the new layer button []

Select the layer Background copy, and go Filter > Pixelate > Mosaic... 18 pixels

CDisgruntling Dots
- - - - - - - - - - - - - - - - - - - - - - - - - - - - - - - - - - - - - - - - - - -


Go to the Channels window, hold down Ctrl, and click on the channel Alpha 2, or the channel with the pattern. A selection outlining the pattern should appear all over your document.

Now, go back to the Layers window and select the layer Background copy, the layer with the mosaic effect. Go Edit > Copy, or Ctrl+C on the keyboard, to copy the pixels to clipboard.

Paste the contents of the clipboard, by selecting Edit > Paste from the menu, or pressing Ctrl+V on the keyboard. Photoshop will automatically create a new layer, and paste the dots into it.

Make sure your layers resemble those in the picture to the left. If they don't, see if you missed a step.


Next, delete the Background copy layer, by dragging it onto the little trash icon at the bottom right of the layers window. []

Finally, click on the Background layer and Gaussian blur it. Filter > Blur > Gaussian Blur... 9 pixels

DAdded Effects
- - - - - - - - - - - - - - - - - - - - - - - - - - - - - - - - - - - - - - - - - - -

Here I've customized the effects, with a description of the effect and how it was achieved in the caption. Enjoy!


Change the blending mode on the dot layer (Layer 1) to Lighten. Make a copy of the dots layer and change the blending mode on the copied layer to Color Dodge, and set the opacity on it to 20%.

I added the Photoshop stock Inner Glow effect to the dots layer, and filled in all the lighter dots with the same light blue.

Read more...

Energy Warp

Step 1 - Setting up the Foundation

Create a new image with square dimensions ( we used 400x400px ) with a "transparent" background. Press D to reset the Color Palette.

Difference CloudsRender some Clouds ( Filter > Render > Clouds ). Next, render Difference Clouds ( Filter > Render > Difference Clouds ) four times. Do this by using the top menu to execute the Difference Clouds filter once, then pressing Ctrl-F 3 times to repeat the last filter (in this case Difference Clouds) three times.


Step 2 - Applying Filters

Color HalftoneApply the Color Haftone filter ( Filter > Pixelate > Color Halftone ) with a Radius of 4 pixels and every Channel set to 90 degrees.

Polar CoordinatesUse the Polar Coordinates Filter ( Filter -> Distort -> Polar Coordinates ) and choose Rectangular to Polar.

Finally, apply a Radial Blur ( Filter > Blur > Radial Blur ) with the Amount set to 100, the Blur Method set to Zoom, and the Quality set to Good.

Press Ctrl-F to repeat the Radial Blur.

If you are doing this tutorial in prepartion for the Trippy Wave tutorial, please click HERE to return.


Step 3 - Adding Color

Hue/SaturationOpen the Hue/Saturation menu ( Image > Adjustments > Hue/Saturation ) and use the following settings to the left.

OverlayDuplicate the layer and change the Blending Mode of the new layer to "Overlay".

Optional: If you wish to add more color, create a new layer above all the existing layers. Set the Blending Mode of this layer to "Color". Now add color to this layer and it should add color to the warp.

Final 1 Final 2

Read more...

Flag Counter

free counters

Blog Archive

  © RYBANZ Searching, Unexpected, Gathering by RYBANZ.BLOGSPOT.COM 2009

Back to TOP